Last stop California, I promise
(As much as I love the ocean, I love my Atlantic Ocean spot)
Get on with it, won’t you Tuc?!
Sorry, no tricking, yes, we have one more diversion until I get back to the actual RACS III system. But it’s for a good reason, I promise. Given the fact there is only one real big piece of MEGADISK left, the hard drive, I was a bit concerned that despite being a sealed system, all the bits would have fallen off the platters. After I connect it, I’m worried that its a ticking bomb that could blow up in minutes. At that point I’d be totally SOL and this project would be dead. While I’m sure I could use the publicly available copy of RACS (which I never realized) and start from scratch, it was having it pick up from where it was that was and be on the internet that was the whole reason for this blog/project.
As you’re aware, I recently found trs80gp which would allow me to run my Model I on my Mac laptop. It lets you attach up to 4 “disk” images, but I also noticed that it allows you to connect 4 “hard drive” images. In the documentation, it mentions
The “drem” format is compatible with the DREM hard drive emulator available at https://www.drem.info/. It stores hard drive images as a pair of files. A file.cfg which gives the geometry and other information and a file.dsk which holds the data for all the blocks.
The “emu” format is compatible with the Gesswein MFM emulator available at https://www.pdp8online.com/mfm/mfm.shtml. Both the “drem” and “emu” formats allow for convenient copying of hard drive images to or from real TRS-80’s.
Given that I heard other people mention DG’s (David Gesswein’s) EMU. There is even a group dedicated to it on Ira’s TRS-80 Discord Server, I decided to look into that.
A little about the drive first
So a little about the disk itself first. The drive was initially sold under the name “MEGADISK”. Here is an ad from 1985
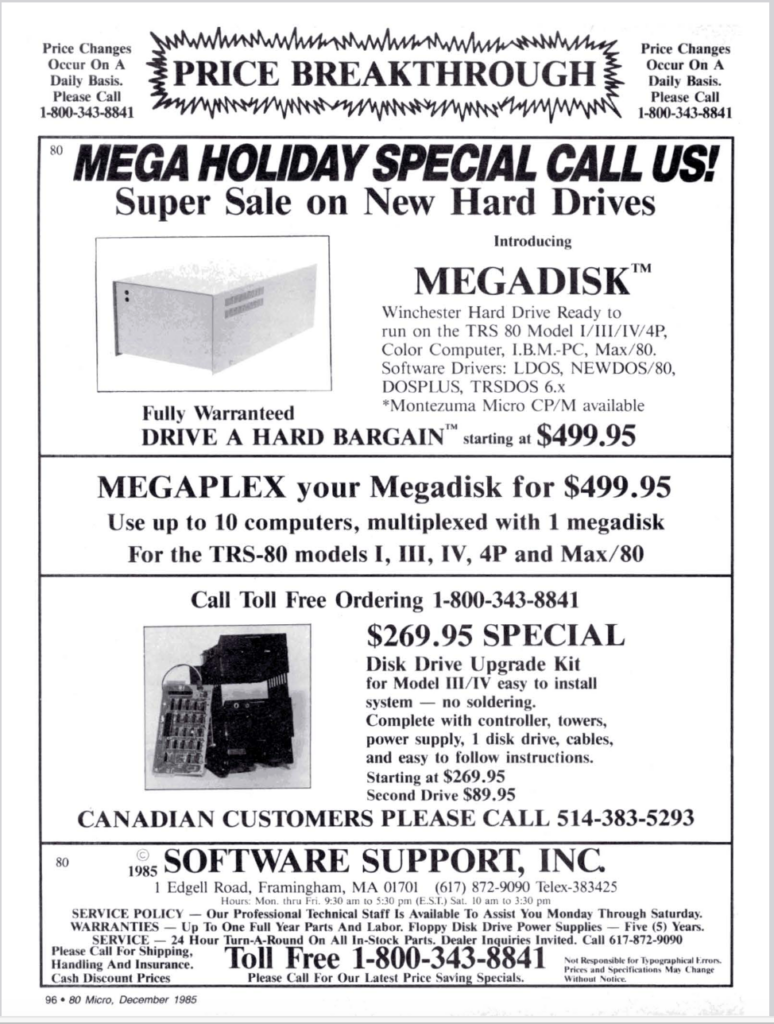
I was lucky enough (Maybe not the right words) to be able to convince my parents to get one for me. So, my parents ordered it (And it was more than the listed price since I got the middle of the pack model, the 15MB model. That’s not a typo. MEGABYTE. M-e-g-a-b-y-t-e. Back then, having a 15MB hard drive was baller. Many many people were still using only diskette drives).
Important Points
When it came, it came with a manual . In the manual it mentioned a few important points
- It would only run under NewDos/80 2.5
- Confirmed it was 15MB, but could have been 5,10,15,20,30 MB
- Had 306 cylinders
- 6 heads
- RWC/WPC was 8
- Step option was 0
- It had an OMTI-20L controller
An RWC/WPC of 8 and a step option of 0. DO YOU KNOW WHAT THAT MEANS?! No, seriously, do you know what that means? I haven’t a clue.
It included a disk called “INSTAPATCH” (You can still get this off the internet) and would need to run some commands for it to be able to modify a clean copy of NewDOS/80 v2.5. I had to run B306154/JCL (Stood for it having 306 cylinders, 15meg, and turn it into 4 virtual hard drives).
COPY BASIC/CMD:1 :0
KILL BASIC/CMD:0
COPY SYS0/SYS:1 :0
COPY SYS17/SYS:1 :0
SYSTEM 0 AL=8,BO=6,BJ=3,BQ=1
PDRIVE 0 2=0
PDRIVE 0 3=0
PDRIVE 0 4 HDS=(0,306,0,6,38,0,0,17442,0,8,0,33)
PDRIVE 0 5 HDS=(0,306,0,6,38,0,17442,17442,0,8,0,33)
PDRIVE 0 6 HDS=(0,306,0,6,38,0,34884,17442,0,8,0,33)
PDRIVE 0 7 HDS=(0,306,0,6,38,0,52326,17442,0,8,0,33)
COPY BASIC/CMD:1 :0
AUTO BASIC RUN"START4"
BOOT
I’m not sure what the hokey pokey with basic was, but it would copy a new SYS0/SYS and SYS17/SYS, set some SYSTEM settings, allocate the drive into the 4 sections, set an autorun and reboot.
After the reboot, it ran a basic program –
Hard Disk Format Utility -- Version 1.1
NEWDOS/80, Version 2.5, Model I
OMTI 20L DISK CONTROLLER
and when done doing its thing (I won’t cover that unless anyone is REALLY interested) it executed “START4” which –
FORMAT 4,,,,Y
FORMAT 5,,,,Y
FORMAT 6,,,,Y
FORMAT 7,,,,Y
COPY :0 :4,,CBF NFMT NDMW /SYS
PDRIVE 4 9 TI=A TD=A TC=35 SPT=10 TSR=3 GPL=2 DDSL=17 DDGA=2
PDRIVE 4 0=4
PDRIVE 4 1=5
PDRIVE 4 2=6
PDRIVE 4 3=7
PDRIVE 4 4=9
PDRIVE 4 5=9
PDRIVE 4 6=9
PDRIVE 4 7=9
PDRIVE 0 0=4
COPY BOOT/SYS:0 :1
AUTO
BOOT
Not totally sure why it did any of this, but after this it would be a totally setup configuration.
Looking into DGMFMEMU-MEGADISK
So one of the first things I noticed when I looked at were what I DIDN’T see. I saw all sorts of MFM controllers and drives, but not my OMTI-20L nor my Disctron D-519. After contacting David and discussing it a bit, I decided to give it a try and see what could be accomplished. When I finally decided to pull the trigger, and mentioned I was in NJ, David mentioned that he’d be coming up that weekend for Vintage Computer Festival Swap Meet, as well as work at the Infoage Computer Deconstruction Lab to work on, what else for a person who’s domain is “pdp8online”, but repairing one of the VCF’s PDPs. He said that if I wanted to meet him there, I could save shipping, and if I could stay he’d spend time helping me actually do it. That was incredibly nice, and decided to take him up on it. I sent him the money for the unit, and paid the 1 day fee to VCF.
Hitting the WALL (NJ that is)
That weekend I packed up my laptop , my little “I can interface anything to anything” kit and the drive enclosure. My interface anything kit is a pouch that my wife bought for me (Sorry women, yea, I’m taken) that I have a variety of cables, plugs, dongles, etc. I can fabricate just about any USB-A, USB-C, USB Mini, USB Micro, Serial DB9, Serial DB25 and some other things to each other. I keep a Mifi in there incase I need internet from just about anywhere, a Mifi that actually isn’t a mifi anymore but a complete Linux system and some other “bits and bobs”. The hard drive went onto the passenger seat on a pillow, and I don’t think I took my hand off it the entire time getting there.
I bypassed the swap meet as that would only be dangerous. I went right to the Deconstruction Lab, before David got there. Got to meet a few great people and geek talk, it was great.
When David showed up, I didn’t want to waste his time so we got down to business.
A bit about the MFMEMU board – MEGADISK
So before I talk about our adventure, lets take a step back. This is a picture of the top side of the board.
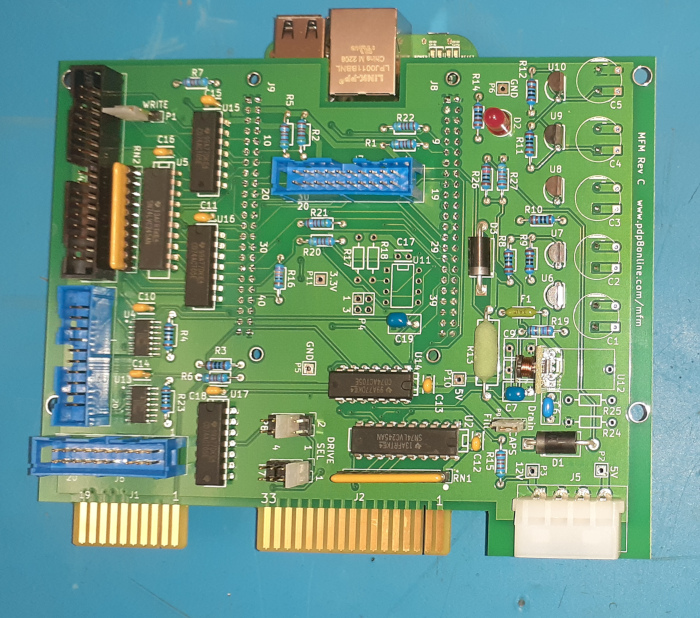
The bottom side has a Beagle Bone (Black or Green options available, and no its not just a color preference).
You connect the power to the while molex in the lower right to power the board. It has the ability to read MFM hard drives by plugging the drive into the appropriate header pin connector sockets. It has the ability to emulate a drive by plugging into the 2 card edge connectors. The ability to write images to the hard disk is still considered “experimental”.
Lets get that dayter (NJ accent)
So the first thing we had to do was take the cables off the Disctron D-519 and get them plugged into the appropriate header pin sockets. Since my cables were keyed that was pretty easy. David brought an external power supply with a molex on that, so that took care or power. I used the USB cable supplied to connect the Beagle Bone (The computer brains of the project) and connected to a hub to my Mac. I was able to get onto the machine running Debian using the default id/pass.
Commands
We ran the 2 commands necessary to setup the machine, and then read the disk –
debian@BeagleBone:~$ mkdir D519
debian@BeagleBone:~$ cd D519/
debian@BeagleBone:~$ setup_mfm_read
Rev C Board
debian@BeagleBone:~$ mfm_read --heads 6 --cylinders 306 --drive 1 --transitions MFMREAD.tran
What this did was create a spot to place the image, changed into it, told the board we wanted to start doing things (Which it replied with the version of the board it saw) and to read the disk. We did have to give it some information. Since I had the manual for the disk, it told me there were 6 heads and 306 cylinders. The transitions is the file it would store the signals read.
When we ran it, well, it produced an error. It thought that we plugged in one of the cables backwards. Weird, its keyed, how could we do that?? Ok, maybe it was just a glitch. We unplugged and replugged the cable wondering if it just wasn’t making connection correctly. Nope, same error. David suggested we take another look. The header that was on the OMTI-20L board wasn’t keyed and noticed that the “stripe is pin one” wasn’t going to 1. How odd.
Apparently the drive was built with the cable connected BACKWARDS all those years! We carefully removed the card edge connector from the drive and but it the other way, and then plugged it back into the board. We ran the command again, SUCCESS!! The disk sprung to life and you could hear it chugging away, with indications from the program that it was advancing. Unfortunately, I didn’t capture it, so can’t show exactly what it did. But it did! Just to be on the safe side David suggested we do it a second time, which also ran perfectly!
I got two usable complete copies!
We had taken two completely usable files, right? Well, partially right. We took 2 completely usable copies of the transitions, but we’d need to run it through another command to be able to make it usable for emulation.
mfm_util --tran MFMREAD.tran --emu MFMREAD.emu --format OMTI_20L
There was only one minor glitch. This is the first time David and the board ever saw an OMTI-20L. Just like there are dozens of formats you can watch a movie in, the same is true of hard drive controllers. They talk the same protocol to the drive, but how and what they do with that protocol is individual to them. So while I had 2 copies, David needed time to analyze the format and make the appropriate code changes to it could do it. He spent a little time at the bench doing it, but I knew he had other things planned and even if he solved it there I didn’t bring the rest of the TRS-80 with me so we couldn’t use it anyway.
So long and thanks for all the fish
After a little bit, I suggested that David take it home and get to why he really came up. I thanked him for everything, acknowledged I had paid the lab fees, and headed out with my new acquisition.
A few days later David sent me a zip file. This contained the EMU file and a EXT file. The EMU file was what I could replace the Disctron D-519 with. The EMU board would read that and be able to act as if it was the hard drive. Looking at it, it made no sense, but as long as the OMTI-20L knew what it was all the better! The EXT file was a different story. That was the binary representation of the data on the machine. Running the Mac “strings” command on it I was able to see peoples names, and words I understood. THE DRIVE HAS DATA!!!
>>FF>> (Fast Forward) – MEGADISK
There was a lot that happened at that point, and the details just aren’t all that important. I worked back and forth with the trs80gp group trying to get the emu to be read by trs80gp. As it turns out, that wasn’t going to happen because they expected it in WD1010 controller and not OMTI-20L. Even the modified NewDos/80 couldn’t get to it. They were able to create a DREM config file that would read it
[DSK]
Name=TRS-80 Hard Drive
Encoding=MFM
RPM=3600
Tracks=306
Sides=6
Sectors=38
First Sector ID=0
Sector Size=256
Format=WDC
Step Signal Hold=8
Interleave=1
Data ECC=NO
I guess I should also mention that I renamed the .ext file to .dsk, and it worked! I now had the ability to have the HD on trs80gp to see exactly what to expect. A bit of anticlimatic cheating, but in the end its necessary. MEGADISK
While also doing this, I noticed a strange thing. Missing sectors. I worked with DG who found a problem, and made the appropriate changes in the code. I ran through the update procedure which is as easy as download from Github and rebuild. He suggested I start back at the tran file and re-create everything. After a lot of confusion on my part, I ended up running
mfm_util --tran MFMREAD.tran --emu MFMREAD.emu --format OMTI_20Lto create the emu. And
mfm_util -m MFMREAD.emu -e MFMREAD.dskto recreate the .dsk file. I checked, and this had the missing sectors. We were set!
Now Tuc, Tuc now?
This ended up being A LOT longer than I expected with MEGADISK. Sorry, but they were all related and needed to get them done to set up for the rest of the success! As for booting off the hard drive in the next entry. A definite maybe. 😉