(Holding at T-minus one)
NOW whats the holdup Tuc?
So I was just doing some of the final prep to get things going, when I ran into an issue. I was trying to make a backup of my boot disk for the 0 drive. Given the age, possible alignment and head issues, I wanted to have a few backups of the boot disk JUST….IN….CASE. I loaded my good disk into the 0 drive, and the fresh newly purchased disk into drive 1.
I typed in
COPY,0,1,01/24/24,FMT,CBFAnd let it go. And what did I get? DEVICE NOT AVAILABLE. :-/ Hrm. Ok, check the power switch, its on. Check the cable is plugged in properly, it is. Check the settings on the dip package. It was semi questionable. Why? I was using a “pulled pin” cable. They look like (When bunched all together)
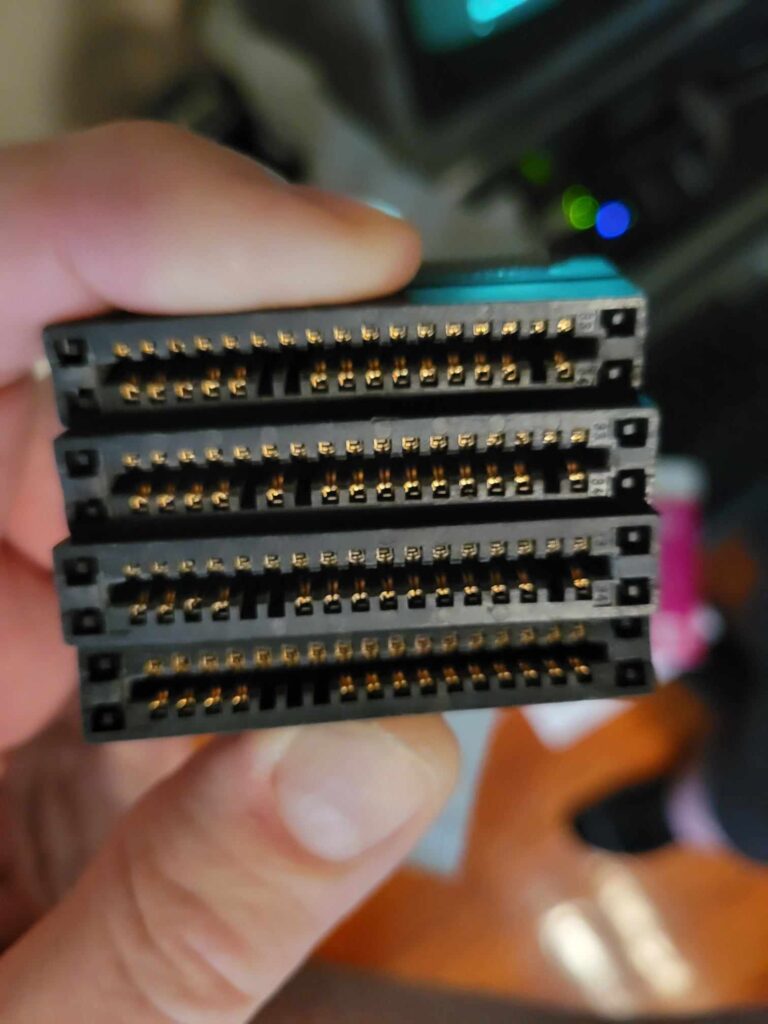
If you start to look from the top down, starting with drive 0, you see:
0 drive cable – First 5 pins exist, 2 pulled pins, and then finally the 2nd to last pin pulled
1 drive cable – First 4 pins exist, next pin is pulled, pin exists, next pin pulled, 2nd to last pin pulled
2 drive cable – First 4 pins exist, next 2 pins are pulled, 2nd to last pin is pulled
3 drive cable – First 4 pins exist, next 3 pins are pulled, 2nd to last pin exists
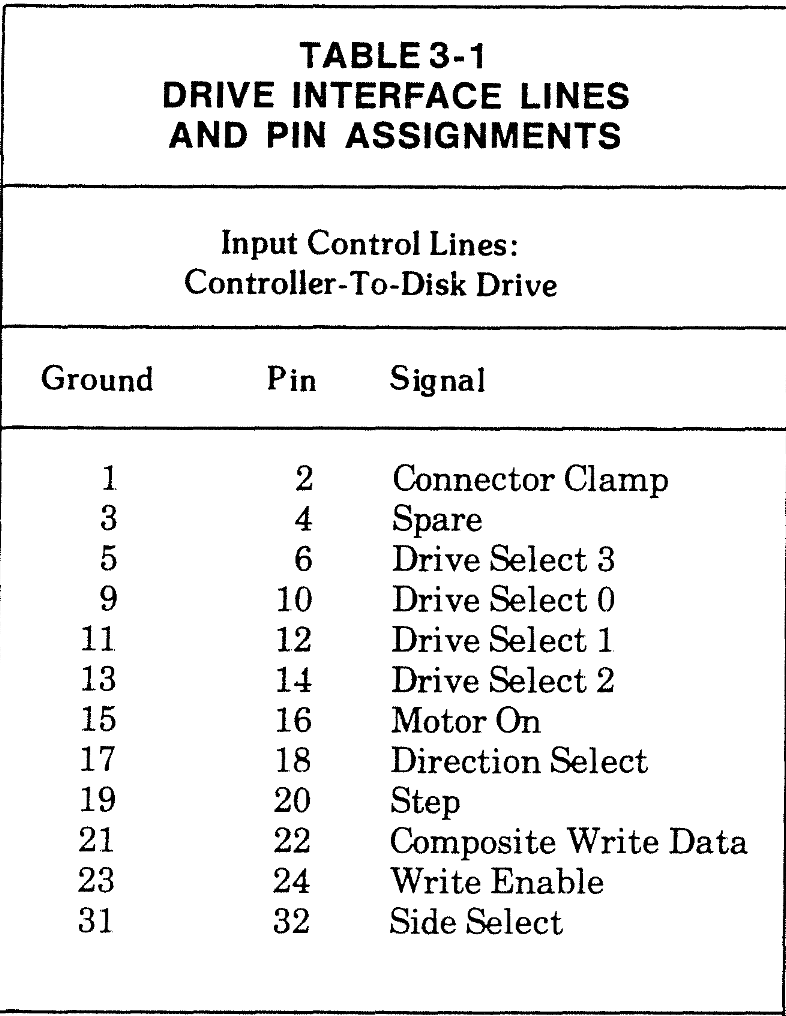
No, this wasn’t due to horrible storage, or improper manufacturing, its completely on purpose. And I’ll tell you why. This is a chart of the function of those pins –
So if you’re like me, which I pity you for, you’d be totally confused as I was thinking I knew what it meant. I’d had always thought that the pins were just 0/1/2/3, and even if they were jumpered on the drive side, they wouldn’t be activated by accident.
A quick little bit about jumpering
The drives I have are Tandon TM-100-1a. You have the ability using the “Programmable Shunt Socket” at location 1E to change some of the settings. So I went to go check this shunt, and noticed I had 2 different models. One had a huge bright blue dip switch package,
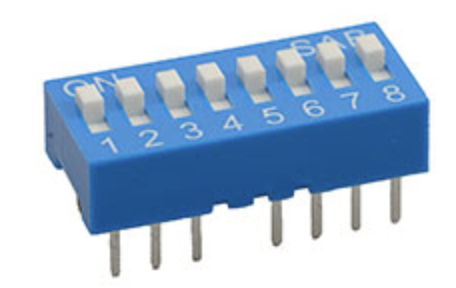
Which is fairly normal. Its an easy way to pop in, and then if you change your mind, you move the appropriate switch to the appropriate position appropriately. 😉 Not a problem, normal everyday type thing. But then…. Then there was THIS monstrosity.
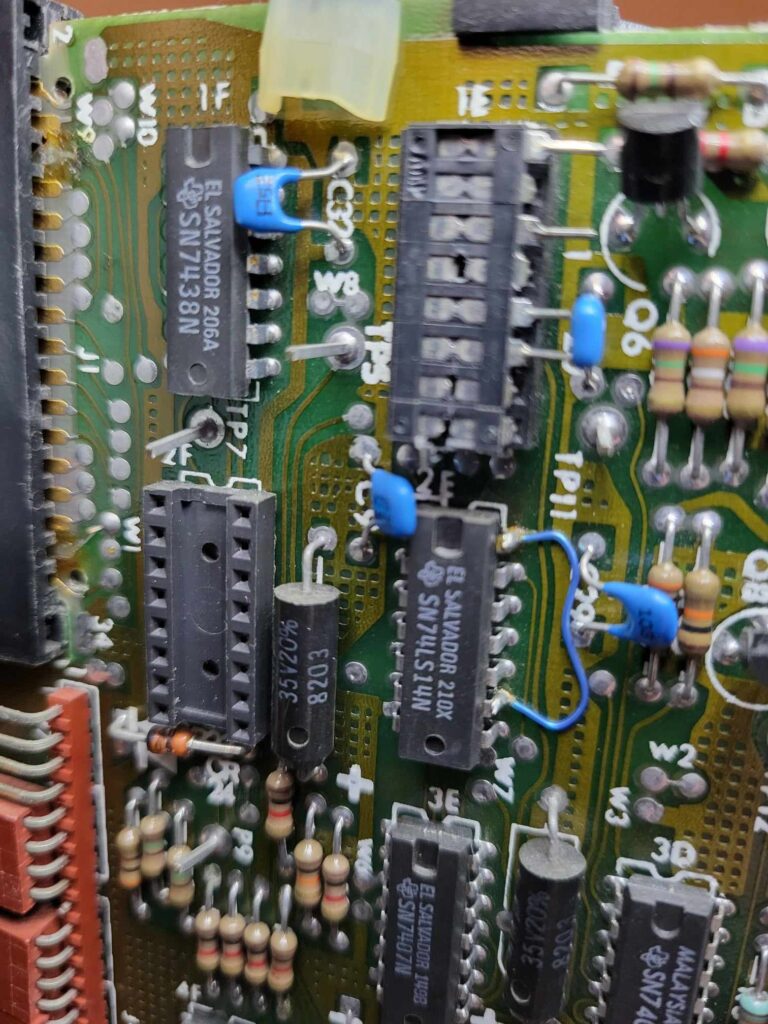
I haven’t a clue what its official name is. Its intended purpose was that you put the whole package in, and whatever lines you didn’t need you snipped out. As you can see, 1/2 of it is snipped, 1/2 had the pins out of the socket. Yea, that’s not going to “cut” it with me.
So, I ordered some nice thin black dip switch packages for replacement. Another thing I realized is that with these drives, you have a socket at 2F that’s called the “Terminator Socket”. No, it’s not a way to summons Arnold, but where you put a terminating resistor chip in when it’s the last drive in the line. Given that I thought I had 2 more drives I couldn’t find, I came to the conclusion (I’ve stopped ASSuM(E)ing) that it was in one of those drives and I needed a replacement.
I reached out on PSKI’s Tandy Discord in the #model-i section, and Amardeep ac9mf, NH Paul and a few of the others set me straight and I ordered a 150ohm Bourns package from Digikey overnight.
Lets get back to the disk issue
The new dip package and terminating resistors showed up the next day. I put the new dips into both 0 and 1 drive, set them to what they were set to previously, and put the terminating resistor into the 1 drive. Powered everything up, I booted off 0, and tried a dir on drive 1. DEVICE NOT AVAILABLE. Meh, I gotta have done something wrong, according to Back to Sureality everything was working, even without the terminating resistor.
So I took a step back, looked at the cable, and re-read the table. Something didn’t make sense. Drive 0 only had switch 2 turned on, the rest off. Drive 1 had switch 3 on, rest turned off. But the cable pins started not to make sense. Why would the order be 3-0-1-2 for the pins? Was my cable messed up like the cable in the Megadisk was? Then I stumbled on a post that explained –
Explanation
Generally, Radio Shack handled drive select by pulling pins in the cable connectors. On the Model I, each drive was internally jumpered to respond on all four different drive selects, the three standard ones from the Shugart definition (pins 10, 12, 14) and one extra one that R.S. defined (pin 32, which later was officially defined as side select for two-sided drives). On the cable, there were four drive connectors, and each had a different one of those four pins left, with the other three removed.
https://www.experts123.com/q/i-want-to-add-or-replace-trs-80-floppy-disk-drives-whats-going-on-with-the-setup-and-cabling.html
Weird, but ok. So it makes sense. So, I turned back to my default learning when dealing with something like this… Start small and work your way out. So the first thing I did was pull the 1 drive off the line, and tried the 0 drive. I know the 0 drive worked, but I was being thorough. I then removed the 0 drive, turned off the 3 jumper and turned on the 2 jumper as well as removed the terminating resistor pack of drive 1.
After all, the other drive didn’t need it to run properly. Tried to boot drive 1 as drive 0 in the drive 0 position. Red light comes on, nothing happens. Curiously, I realize I don’t hear the spindle spinning. I give it a nudge and reboot again. SUCCESS! It seems it was just a bit jammed, and a bit of a helping hand got it going. I decided to press my luck, put 0 back in the right place, and rejumper 1 to go in the 1 place. SUCCESS! So what about the terminating resistor? I plan on putting it there “just incase”.
Back on track to liftoff
Now that the drives were both working properly, I decided to go back to making the copies. I put the master in 0, my bulk floppies I bought in 1, and off I went. Well, so I thought. I got an error
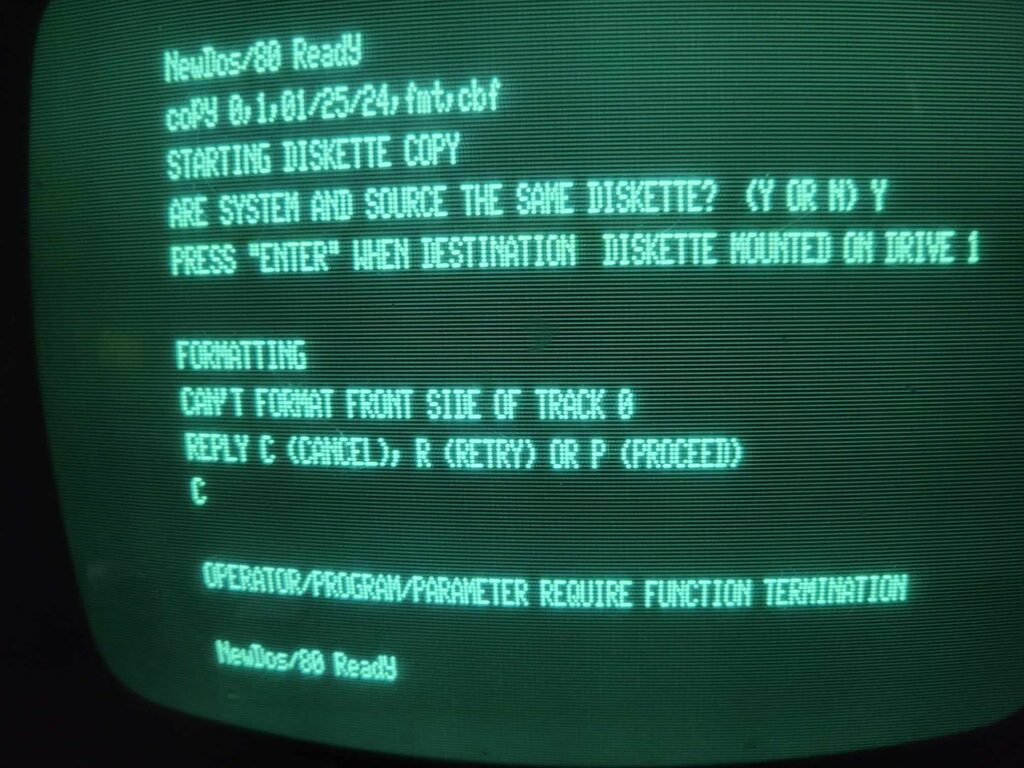
That’s not a good start. The drive works, but is so messed up can’t even do anything on track 0? Ok, let’s make a giant leap and its the disk. 1 out of 100 I bought can be bad, lets try another. Track 17. Then another. Track 30. Disk after disk gave issues on format. But how? I bought some DSHD (Double sided, High Density) disks. They should be better than the regular old DSDD (Double sided, Double Density {AKA Low Density}).
Things I Did
- I bought really good disks, from a place that seemed reputable.
- I sent a whole bunch to Ira and he didn’t complain, so it has to be the disk drive.
- I cleaned it before, but maybe it got dirty when I was lugging it back and forth to Tandy Assembly.
I’ll just use the kit I still have from Back to Sureality and… now where did I put that? Not in my diskette box from Ira, the logical place it would be. What about my project box? (I start a new milk crate that I keep everything in while I’m working on a project so while I’m working everything is in one place, and when I’m done I either move back things to their original place or put in a smaller milk crate to keep all the bits together). Nope, not there. SIGH. So I take to Amazon and Etsy. I buy :
Etsy
- New cleaning disk
- Cleaning disk replacement pieces
Amazon
- Cleaning disk kit, looks ancient, but just incase the Etsy doesn’t work out
- 6 inch long wooden cotton swabs
- I remember I’m out of the name brand swabs for my ears, so a package of those
- Well, they reminded me I haven’t ordered Raisins for a bit, and I am out
- Oh, and dried pineapple
- MUST RESIST MORE REORDERS
Next…
While I’m waiting, I tell the people on the Tandy Discussion group about my exploits, and offhandedly mention I might just want to lube the spindle. I also mention the cleanliness issue and that it might just be out of alignment too. Patrick B. (TTR) mentions –
drive were not designed with “lubing options” the gliders being of plastic, will sweep/squeegee back and forth any lubricant (oil or residual based) along with stirred up dust which will make this become goo in time and provoke even more issues than not.
That said, a dry lubricant like Teflon or graphite based, could be used spray iut on a lint free rag and wiping the rail with it, this will have a minimalistic negative effect on the workings of the drive. please note and many forget this, to clean the plastic asssembly of the glider (inside where the bar actually goes through. I have repaired many drives that where non working and pre-lubed by others and found deposits of dried oil, grease and dirt )
At Last…
Lastly, because a great many of theses drives are kept in less than optimal conditions, I always suggest to run a 3000 grit sandpaper (nothing lower can be acceptable as it will generate striations and gouge the metal ) on the rails, by cut a piece wrapping it on the rail and gently move the rail length-wise (not rolling (turning) it because this generate striations in interference of the movement of the gliders and will cause more tension and resistance to the movement)
Doing this removes minute oxidations and possibly rusting spots that generate in movement massive amount of resistance, you can always feel the bar becoming “polished” after a few strokes back and forth in your hand as its is liberated of theses oxidations.
Wipe the rails with 99% alcohol until clean (this is the really good way of doing a rail cleaning btw) PS if you need a video of this show/explain let me know I can make one. NB: yes it is prefereable to remove rails from drive to do this but can be done with patience leaving them in place
Tandy #model-I Discord
We have a little back and forth about pdrive settings, and trying just a format before the copy, and Amardeep ac9mf quietly asks “Just to confirm…these are not high density disks, right?” Of course they’re high density, why wouldn’t I buy the best? That’s the same reason I’m running OM4 fiber at my NC house (capable of running 100G over 125meters) when I only need to pass 1G. If you’re going to do it, overdo it. Wait, “HD disks would have errors formatting like that.” he says. Huh? Isn’t better, well, better? Not in this situation. Then his final truth bomb hit me.
“No, unfortunately they have too high a coercivity to be magnetized effectively at single and double density write levels.  ” (coercivity – yea, I had to look it up, the degree to which a ferromagnetic material can withstand an external magnetic field without becoming demagnetized.) So bottom line, the disks were too good for the drive, and may be the problem. UGH, that’s what I get for buying better disks. I also learn that Ira DID have issues with them. DOUBLE UGH. Ok, I need to find some DSDD disks ASAP! No one on the discord can get them to me for the next day. I google and can’t find any, but I do see that my friendly Amazon can get them to me tomorrow. With a catch.
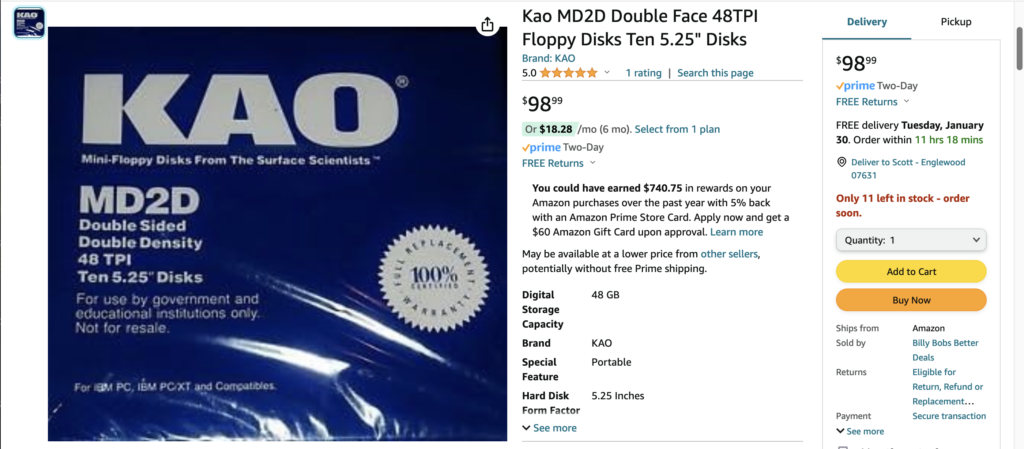
I could get the right type of disks, next day, AS LONG AS I WANTED TO SPEND ALMOST $100! Well, I was $100 desperate. So, I placed my order (As well as an order for another box from someone else much cheaper but slower, as well as another company for 20 more much cheaper and slower).
Needless to say, they came in, formatted properly, copied properly, and work great. SUNNABIOTCH! Ok, well, hopefully the other disks come soon and , well, maybe the Kao find their way back to Amazon.
So what’s your next excuse?
None.